Hello everybody, today i want to share with you about "how to create partition & install hard disk in windows vista / seven / XP". Most of time we face a problem when we want to install hard disk & create a partition. It is a bis problem for new user who want to do this job at home.So, now I want to share it with you. For this please use the flowing steps:
1. Click Windows icon (at bottom left of monitor)
2. Click Control Panel
3. Click System and Security
4. Click Administrative Tools
5. Double Click Computer Management
6. Click on the Storage bar and under it click on Disk Management
7. Left Click on partition that you want to re-size (shrink or extend)
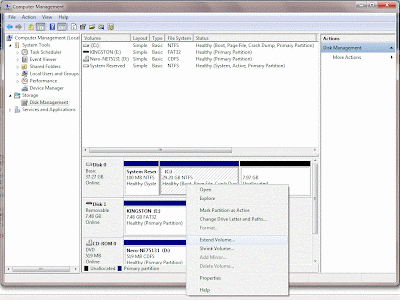
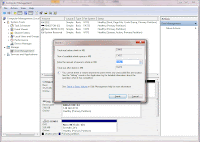
9. Enter the amount of space to shrink (in MB), windows already give maximum size to shrink, so we can only reduce the size.
10. Click shrink.
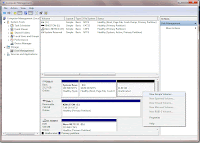
12. Wizard for creating new simple volume will appear, just click next
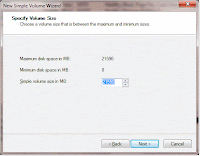
13. Type size of partition we want to create, and click next
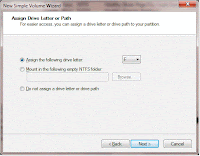
14. Assign drive letter for partition, and click next
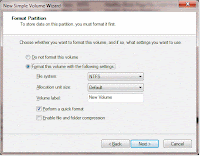
15. Choose format of partition (in this tutorial, i choose NTFS), and don't forget to choose "perform a quick format" to format partition quickly, and click next
16. Click finish to complete creating partition, and new partition already create.
I hope this tutorial can help everyone to create partition & install hard disk in windows vista / seven / XP.
1. Click Windows icon (at bottom left of monitor)
2. Click Control Panel
3. Click System and Security
4. Click Administrative Tools
5. Double Click Computer Management
6. Click on the Storage bar and under it click on Disk Management
7. Left Click on partition that you want to re-size (shrink or extend)

8. In this tips and tricks i want to shrink volume of disk 0 on "C" partition, so click shrink

9. Enter the amount of space to shrink (in MB), windows already give maximum size to shrink, so we can only reduce the size.
11. Now we have unallocated disk space to create a partition, left click on unallocated disk space and click new simple volume

12. Wizard for creating new simple volume will appear, just click next

13. Type size of partition we want to create, and click next
14. Assign drive letter for partition, and click next

15. Choose format of partition (in this tutorial, i choose NTFS), and don't forget to choose "perform a quick format" to format partition quickly, and click next

16. Click finish to complete creating partition, and new partition already create.
I hope this tutorial can help everyone to create partition & install hard disk in windows vista / seven / XP.
here are some text to remember for partition ........
Assign The Following Drive Letter Select an available
drive letter in the selection list provided. By default, Windows 7
selects the lowest available drive letter and excludes reserved drive
letters as well as those assigned to local disks or network drives.
Mount In The Following Empty NTFS Folder Choose this option to mount the partition in an empty NTFS folder. You must then type the path to an existing folder or click Browse to search for or create a folder to use.
Do Not Assign A Drive Letter Or Drive Path Choose this option if you want to create the partition without assigning a drive letter or path. Later, if you want the partition to be available for storage, you can assign a drive letter or path at that time.
File System Sets the file system type as FAT, FAT32, or
NTFS. NTFS is selected by default in most cases. If you create a file
system as FAT or FAT32, you can later convert it to NTFS by using the
Convert utility. You can’t, however, convert NTFS partitions to FAT or
FAT32.
Allocation Unit Size Sets the cluster size for the file system. This is the basic unit in which disk space is allocated. The default allocation unit size is based on the size of the volume and, by default, is set dynamically prior to formatting. To override this feature, you can set the allocation unit size to a specific value. If you use many small files, you might want to use a smaller cluster size, such as 512 or 1,024 bytes. With these settings, small files use less disk space.
Volume Label Sets a text label for the partition. This label is the partition’s volume name and by default is set to New Volume. You can change the volume label at any time by right-clicking the volume in Windows Explorer, choosing Properties, and typing a new value in the Label field provided on the General tab.
Perform A Quick Format Tells Windows 7 to format without checking the partition for errors. With large partitions, this option can save you a few minutes. However, it’s usually better to check for errors, which enables Disk Management to mark bad sectors on the disk and lock them out.
Enable File And Folder Compression Turns on compression for the disk. Built-in compression is available only for NTFS. Under NTFS, compression is transparent to users and compressed files can be accessed just like regular files. If you select this option, files and directories on this drive are compressed automatically.


.jpg)


No comments:
Post a Comment